31 July 2009

Oracle SQL Tuning

In many scenarios, I have been changing and executing SQL statement to meet the performance requirement posed by client.

But normaly, i did not have any direction how to tune and whom to ask,

So I write an adhoc query and try to execute it, but I will not be sure whether Iam in right path or not.

In this scenario, I used Oracle database to give the tuning recommendations, rather than explaining all the tables and schemas to another person and trying adhoc queries.

From Oracle database 1og we have a package called DBMS_SQLTUNE to tune a query and get the recommendations from the database in form of a report.

So let's Start.

Following are the steps

1. Getting the Grants for accessing the SQL Tuning Advisor

2. Create a SQL Tuning task.

3. Execute a SQL Tuning Task.

4. Display the results of SQL Tuning task.

5. Implement the recommendations.

1.Getting the Grants for accessing the SQL Tuning Advisor

We need to get the following Grants before accesing the SQL Advisor
features of Oracle 10g.
//Grants to be given
// Log in as sys and give the following grants to the developer users
// Here Iam using SCOTT as the Developer user
GRANT ADVISOR to SCOTT;
GRANT EXECUTE ON DBMS_SQLTUNE to SCOTT;
GRANT SELECT ON DBMS_ADVISOR_LOG to SCOTT;
2. Create a SQL Tuning task
Lets take for example the following is the SQL Statement to be tuned.
//SQL Statement to be Tuned

SELECT e.*, d.*

FROM emp e

JOIN dept d

ON e.deptno = d.deptno

WHERE NVL(empno, ''0'') = :empno;

After identifying the SQL statement to be tuned,
create an anonymous block
as below and call the 'CREATE_TUNING_TASK' function of the
'DBMS_SQL_TUNE' package.
//Creating the tuning task

DECLARE

l_sql VARCHAR2(500);

l_sql_tune_task_id VARCHAR2(100);

BEGIN

l_sql := 'SELECT e.*, d.* ' ||'FROM emp e JOIN dept d ON e.deptno = d.deptno '

||'WHERE NVL(empno, ''0'') = :empno';

l_sql_tune_task_id := DBMS_SQLTUNE.create_tuning_task (

sql_text => l_sql,

bind_list => sql_binds(anydata.ConvertNumber(100)),

user_name => 'scott',

scope => DBMS_SQLTUNE.scope_comprehensive,

time_limit => 60,

task_name => 'emp_dept_tuning_task',

description =>'Tuning task for an EMP to DEPT join query.');

DBMS_OUTPUT.put_line('l_sql_tune_task_id: '|| l_sql_tune_task_id);

END;
3. Execute a SQL Tuning Task
After the creation of the SQLtuning task, we can execute the SQL Tuning task
to be given to the SQL Tuning Advisor present in the Oracle database 10g,
to get the tuning recommendations.
//Executing a SQL Tuning task

BEGIN

DBMS_SQLTUNE.EXECUTE_TUNING_TASK( task_name =>'emp_dept_tuning_task');

END;

Did you notice above that we call the 'EXECUTE_TUNING_TASK' function of the 'DBMS_SQLTUNE' package.

You could see that we are giving some inputs to the 'EXEUTE_TUNING_TASK' function
which is the name of the task we created in the previous step.

4. Generating the report
We have executed the Tuning task
and what happened to my Tuning report.
Will it be text format or excel format or directlywritten to database....


To check the status of the SQL Tuning task , we can use the following SQL statement.
//To check the status of the SQL Tuning task

SELECT task_name, status FROM dba_advisor_log WHERE owner = 'SCOTT';


To have the report in text format . log in into SQL * plus and run the following statement
//To get the report for the SQL Tuning task

SET LONG 1000

SET LONGCHUNKSIZE 1000

SET LINESIZE 100

SELECT DBMS_SQLTUNE.REPORT_TUNING_TASK( 'my_sql_tuning_task') FROM DUAL;


We would be getting the report in the following format in the SQL * plus interface.
// report generated from SQL * plus     
RECOMMENDATIONS

--------------------------------------------------------------------------------

GENERAL INFORMATION SECTION

-------------------------------------------------------------------------------

Tuning Task Name : emp_dept_tuning_task

Scope : COMPREHENSIVE

Time Limit(seconds): 60

Completion Status : COMPLETED

Started at : 05/06/2004 09:29:13

Completed at : 05/06/2004 09:29:15


-------------------------------------------------------------------------------

SQL ID : 0wrmfv2yvswx1

SQL Text: SELECT e.*, d.* FROM emp e JOIN dept d ON e.deptno = d.deptno

WHERE NVL(empno, '0') = :empno


-------------------------------------------------------------------------------

FINDINGS SECTION (2 findings)

-------------------------------------------------------------------------------


1- Statistics Finding

---------------------
Table "SCOTT"."EMP" and its indices were not analyzed.


Recommendation

--------------

Consider collecting optimizer statistics for this table and its indices.

execute dbms_stats.gather_table_stats(ownname => 'SCOTT', tabname =>

'EMP', estimate_percent => DBMS_STATS.AUTO_SAMPLE_SIZE,

method_opt => 'FOR ALL COLUMNS SIZE AUTO', cascade => TRUE)


Rationale

---------

The optimizer requires up-to-date statistics for the table and its indices

in order to select a good execution plan.


2- Restructure SQL finding (see plan 1 in explain plans section)

----------------------------------------------------------------

The predicate NVL("E"."EMPNO",0)=:B1 used at line ID 2 of the execution plan

contains an expression on indexed column "EMPNO". This expression prevents

the optimizer from selecting indices on table "SCOTT"."EMP".


Recommendation

--------------

Rewrite the predicate into an equivalent form to take advantage of

indices. Alternatively, create a function-based index on the expression.


Rationale

---------

The optimizer is unable to use an index if the predicate is an inequality

condition or if there is an expression or an implicit data type conversion

on the indexed column.


-------------------------------------------------------------------------------

EXPLAIN PLANS SECTION

-------------------------------------------------------------------------------


1- Original

-----------

Plan hash value: 1863486531


----------------------------------------------------------------------------------------

| Id | Operation | Name | Rows | Bytes | Cost (%CPU)| Time |

----------------------------------------------------------------------------------------

| 0 | SELECT STATEMENT | | 1 | 107 | 4 (0)| 00:00:01 |

| 1 | NESTED LOOPS | | 1 | 107 | 4 (0)| 00:00:01 |

| 2 | TABLE ACCESS FULL | EMP | 1 | 87 | 3 (0)| 00:00:01 |

| 3 | TABLE ACCESS BY INDEX ROWID| DEPT | 1 | 20 | 1 (0)| 00:00:01 |

| 4 | INDEX UNIQUE SCAN | PK_DEPT | 1 | | 0 (0)| 00:00:01 |

----------------------------------------------------------------------------------------

Note
-----
- dynamic sampling used for this statement
-------------------------------------------------------------------------------
1 row selected.
5. Implement the recommendations

From the recommendations we found that the indexes for the tables were not used,
so it leads to the full scan of the table thus leading to the perfoemance degradation.

So as per the tuning report create a function based index so the indexes are used, thus
reducing the time to fetch a row.

So plung into action thus tuning your SQL statement.


For Complete Description about the Oracle Automatic SQL Tuning features
follow the link
Oracle Automatic SQL Tuning - Oracle Site
Improving SQL statement usining Automatic SQL Tuning
Automatic SQL Tuning in Oracle database 10g - Oracle Base.com
Note
Kindly post your comments for any Typo errors or any ambiguities.
Thanks in Advance

30 June 2009

Oracle SQL query execution hiearchy

When I was working yesterday, I found the execution hiearchy of execution of SQL statements

SELECT name,deptno
FROM employee
WHERE ID NOT EXISTS(SELECT ID FROM Bank_Customers)
GROUP BY Deptno;

Sequence of Execution
1. FROM Clause
2. WHERE Condition
3. GROUP Clause
4. HAVING Clause (You DBA advises to filter data in WHERE clause I Suppose)
5. SELECT
6. ORDER Clause

  • FROM - It fetch all the Data from the respective tables
  • WHERE - It applies the data filter using the WHERE clause
  • GROUP - The Group clause is called to Group Data
  • HAVING - The Having clause applies data filter to the Grouped Data,When you apply the filter at this stage the performance decreases, So try to filter the maximum at the WHERE clause level itself
  • SELECT - The Select Clause selects the required columns (Thus Choosing one column or two Column does not have much impact on Database performance.But you should not apply '*' to retrieve all the rows as the huge amount of data leads to Network traffic and the performance of your application becomes slow.
  • ORDER - Then the ORDER lause sorts the data and then gives back to the user to be shown in the application.


*************************************************************************************

Kindly correct me if Iam wrong by leaving a comment or please drop me a mail to Subramanian.kaushik@hotmail.com


23 May 2009

Oracle Terminal Reference Forms 6i


I found that there was no documentation available properly about using the 

Oracle terminal tool for Oracle forms 6i.


I have summarized the posts present in different web sites and forums together .

for using Oracle terminal.


Using the User Defined Key 0-9 

In order to create a key binding for a key trigger, perform these actions:

  • In Form Builder, create your function key trigger.
  • Using Oracle Terminal, open the appropriate Form Builder resource file (for MS Windows open FMRUSW.RES --> Normally present under the folder Oracle-Forms-Home\Forms60 folder).
  • Choose Functions/Edit Key to invoke the Key Binding Editor.
  • In the Key Binding Editor, double-click on windows-sqlforms to invoke Key Binding definition window.
  • Select the Insert Row button and then enter the action that corresponds to your function key trigger. An example of the chart for MS Windows follows:
       – Key-Fn Trigger - KEY-F3
       – Microsoft Action - User defined Key 3
       – Microsoft Code - 85
  • Specify the key binding for your trigger, then select OK.
  • Select the Product Actions Editor.
  • Double-click on the sqlforms category.
  • Select the Insert Row button, enter the Action, Code and Description for your trigger, then select OK.
  • Dismiss the Product Action and Key Binding Editors that invokes a help system by selecting OK for each, and then choose File/Save.
  • Choose Functions/Generate to generate your modifications and create a new resource file that incorporates your changes. Save the new resource file.    
//To create a KEY-F3 trigger, enter into Action Field in Key Bind 
//Definition window  User Defined Key F3  
//Specify a key binding for your trigger, and then select OK  
  Action Binding User Defined Key F3  Control+F2  
//Enter the following to Microsoft Windows  Action Code 
 Description User Defined Key F3 85 [Trigger description] 
Use Accelerators For Commonly Used Functions (Menu Items)

Accelerators are keyboard shortcuts for frequently performed actions (for example, Ctrl+P for print, Esc for escape or cancel). When possible, it is a good (but not mandatory) practice to provide keyboard accelerators. A good rule to use is to always set a keyboard accelerator for menu items that appear visually on a tool bar. Keyboard shortcuts allow users to bypass opening the menu by using a specific combination of keystrokes that perform the same function as a corresponding menu item.

Developer/2000 provides for five logical accelerator keys, [Accelerator 1] through [Accelerator 5] that are set up with Oracle Terminal. To assign a key, find the menu item in the Object Navigator and display its property sheet. In the Property Palette, under the Functional node, type the name of the logical accelerator key you want to assign to the item in the Keyboard Accelerator property field. For example, enter Accelerator 1.

In the Oracle Terminal, associate this logical accelerator key, for example, to a key sequence such as Ctrl+F to open the File menu item. Instead of pressing Alt+F, then S, to activate menu item File-Save, a user can just press Ctrl+S to execute the same function. Now the user is able to activate a menu item without going through the menu.

This graphic is a screen capture of the Oracle Forms Builder Property Palette.  This screen capture displays a list of Oracle Form Properties along with their editable associated property fields.  The middle of the screen displays the Keyboard Accelerator property, with Accelerator 1 typed in the column to the right, which is the Keyboard Accelerator property field.  The Keyboard Accelerator property has 5 attributes associated with it.  The attributes are visible in menu, visible in horizontal menu toolbar, visible in vertical menu toolbar, icon in menu, and icon filename.  In the property field, yes has been selected for the visible in menu, and no is selected for the other attributes.

Use Access Keys to Select or Execute an Item (Mainly for Buttons or Textitems)
This technique applies to the buttons, radio buttons, menus and check boxes. It specifies the character that will be used as an access key, allowing the user to select or execute an item by pressing a key combination, such as Alt+C. In a Label Property on Property Palette place the name of the menu item with an ampersand after the first letter: for example “A&ction”. The access key is displayed with an underscore in the item label. Buttons with the iconic property set to “Yes” cannot have access keys.

Push buttons, checkboxes, tabs, menu items and radio buttons should have an access key unless:

  • They are keyboard-navigable (an access key is still desirable in this case).
  • An excessive number exist such that deriving a unique letter would be difficult (in which case the ones with no access key must be navigable).
  • They are not absolutely critical to the functionality of the product.
  • For Checkboxes and Radio Buttons: if they are part of a multi-row block and use the Prompt, not the Label attribute, they cannot render an access key.
List of Valid Action Codes which you can use in Oracle Terminal 
Here is a list of the numeric "action codes" that correspond to various product actions that are available in Oracle Forms. This list might not be complete nor current in respect to the latest version of Oracle Forms available, but it should be useful as a reference.   
    

1  Next Field      
2  Previous Field      
3  Clear Field      
4  Left Arrow      
5  Right Arrow      
6  Up Arrow      
7  Down Arrow      
8  Goto Beginning Of Line      
9  Goto End Of Line     
10  Goto Extreme Vertical Up     
11  Goto Extreme Vertical Down     
12  Scroll Up     
13  Scroll Down     
14  Scroll Left     
15  Scroll Right     
16  Delete Character To Left     
17  Delete Char On/Right     
18  Delete Line     
18  Terminate Input On Form     
19  Move Cursor Left     
20  Move Cursor Right     
21  Scroll-Up     
22  Invoke Editor For Field     
23  Delete Character     
23  Insert Line     
24  Search     
25  Toggle Insert/Replace Mode     
26  Select Item     
27  Return     
28  Invoke Menu     
29  List Of Values     
30  Invoke Context-Sensitive Help     
31  Redraw Screen     
35  Show Keys     
36  Accept     
61  Next Key     
62  Clear Record     
63  Delete Record     
64  Duplicate Record     
65  Insert Record     
66  Next Set     
67  Next Record     
68  Previous Record     
69  Clear Block     
70  Ask Block     
71  Next Block     
72  Previous Block     
73  Duplicate Field     
74  Clear Form     
75  Enter     
76  Enter Query     
77  Execute Query     
78  Error     
79  Print     
80  Clear Query     
81  Update Record     
82  User Defined Key 0     
83  User Defined Key 1     
84  User Defined Key 2     
85  User Defined Key 3     
86  User Defined Key 4     
87  User Defined Key 5     
88  User Defined Key 6     
89  User Defined Key 7     
90  User Defined Key 8     
91  User Defined Key 9     
92  Clear Eol  
11004  Return To Application Menu  
11005  Previous Menu  
11006  Return To Main Menu  
11007  Enter > 1 Os Commands  
11008  Enter 1 Os Command  
11009  Show Background Menu  
11010  Background Menu Option 1  
11011  Background Menu Option 2  
11012  Background Menu Option 3  
11013  Background Menu Option 4  
11014  Background Menu Option 5  
11015  Background Menu Option 6  
11016  Background Menu Option 7  
11017  Background Menu Option 8  
11018  Background Menu Option 9  
11019  Background Menu Option 10  
11020  Re-Enter Application Parameters  
11021  Re-Enter Menu Parameters  
11022  Accelerator Key 1  
11023  Accelerator Key 2  
11024  Accelerator Key 3  
11025  Accelerator Key 4  
11026  Accelerator Key 5  
11027  Accelerator Key 6  
11028  Accelerator Key 7  
11029  Accelerator Key 8  
11030  Accelerator Key 9  
11031  Accelerator Key 10

    Kindly revert for any clarifications


19 May 2009

Need to Upgrade Oracle applications

I found a interesting article from Binarysematics which clearly explains what
are the advantages in migrating Oracle Forms application and
Why the people are not doing so?

Kindly check the following link


16 May 2009

Calling Java procedures from ORACLE PL/SQL

Why we need to call JAVA procedures in PL/SQL?  

JAVA one of the oldest and type safe language ever seen.It was first introduced into the IT world when C++ was not able to call remote procedures.

Almost there are thousands and thousands of logic from Hello world to complex logic fo aircrafts written in JAVA.So it is important to reuse the logic than rewriting from scratch in PL/SQL.

I have summarized the steps below to call a JAVA method from ORACLE 

Note
   Only STATIC methods can only be called  from PL/SQL as it as Modular language

Steps
1. Create a JAVA class to be loaded into Oracle database.

     Iam using our very old hello world program.Instead of printing Hello World to console, it would return the value to the user.

public class Hello 
{  
public static String world()  
{  
return "Hello world";  
}


2. Compile the JAVA file using JAVAC
     Note
           Kindly add ORACLE_HOME/JDK/BIN in your PATH variable
Microsoft Windows XP [Version 5.1.2600] 
(C) Copyright 1985-2001 Microsoft Corp.  
C:\Documents and Settings\Administrator>javac H:\JDEV\Hello.java  


3. Load the JAVA files into Oracle database          
Note
   You should have added the path of ORACLE_HOME\JDK in the classpath or
it would show the driver not found error is thrown
C:\Documents and Settings\Administrator>loadjava -user store/store@shanthaguru H:\jdev\Hello.class  
C:\Documents and Settings\Administrator>


Note
     After loading it into database , you can verify it using SQL*plus
   or SQL Developer
  
SQL * PLUS
SQL*Plus: Release 10.1.0.2.0 - Production on Sun May 17 13:07:14 2009  
Copyright (c) 1982, 2004, Oracle. All rights reserved.  
Connected to: Oracle Database 10g Enterprise Edition Release 10.1.0.2.0 - 
Production With the Partitioning, OLAP and Data Mining options  
SQL> select object_name from user_objects where object_type = 'JAVA CLASS';  
OBJECT_NAME 
-------------------------------------------------------------------------------- 
Hello


SQL DEVELOPER
    Open the JAVA node under the corresponding schema and see the loaded
JAVA Classes


4. Creating a PL/SQL procedure for calling the loaded the JAVA method   
SQL> CREATE OR REPLACE FUNCTION helloworld RETURN VARCHAR2 AS  
2 LANGUAGE JAVA NAME 'Hello.world () return java.lang.String';  
3 / Function created.


Note
   The return type should be JAVA specfic , note this in the above code.


Now try call the PL/SQL function to call the JAVA method

SQL> select helloworld from dual;  
HELLOWORLD 
-------------------------------------------------------------------- 
Hello world

14 May 2009

Oracle and Sun

Hi,
   Atlast Oracle and Sun merges and it would be a great break through.
Kindly check the Following link for more details


12 May 2009

Oracle Forms vs .NET

Hi,

There would some dilemmas when selecting the IDE and development tool when 
constructing your windows or web application.

I think this is an intresting thread which has hot conversation in favour of both Oracle forms and
.NET. 

Kindly click the following link


07 May 2009

Oracle Forms connection to MSACCESS


Hi,
 In This Post we would Look into how to Connect Oracle Forms to MSACESS and combining the feature of Oracle forms and MSACCESS.

Steps
1. Create a MDB file with a username and password
     I think everyone knbows to open access and create an MDB file.

2. Run the following scripts
     \Forms_home\OCA60\SQL\ACCESS  --> *ACCDMBLD.SQL* (Used to create EMP and DEPT table)
       \Forms_home\OCA60\SQL                    --> *DEMODATA.SQL* (Insert demo data into the tables)

3. Create a ODBC data source in the data sources management tab in windows
    1. Open the Data source managment tab
        Control Panel --> Administrative tools ---> Data Sources (ODBC) 
        
     
    2.  Click the Add button,*Create new datasource* screen opens


    3. Select Microsoft Access Driver(*.mdb) and click Finish.
     
    4. ODBC Microsoft access screen opens, give a name for the data source
        and click the OK button


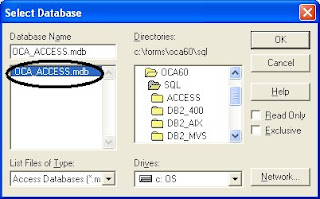
    5.  Click  the selet button and select the corresponding MDB file
         and click the OK button


    6. The datasource would have been created and check the initial screen
      
        
4. Open the Forms Builder and Connect to MSACCESS     
    In connect field type  username/password@ODBC:DATA_SOURCE_NAME

5. Create a Database Block using the database lock wizard and set the primary property of the EMPNO    column to       'Yes' before running the form.You would be able to do all the insert, update, Delete , Query     Operation from         that form.


Connecting Oracle to MSACCESS

Hi,

This post summarizes the most important and intresting feature of Oracle which I have tried.

Normally for data entry operators, we would enter the data for internal application in small database like MSACCESS,.... 

but the query feature of Oracle is easy, so if you want to maintain your datasource as MSACCESS and if you want to do any queries using Oracle SQL, this helps you.

Steps
1. Create a MDB file with a username and password
     I think everyone knbows to open access and create an MDB file.

2. Run the following scripts
     \Forms_home\OCA60\SQL\ACCESS  --> *ACCDMBLD.SQL* (Used to create EMP and DEPT table)
       \Forms_home\OCA60\SQL                    --> *DEMODATA.SQL* (Insert demo data into the tables)

3. Create a ODBC data source in the data sources management tab in windows
    1. Open the Data source managment tab
        Control Panel --> Administrative tools ---> Data Sources (ODBC) 
        
     
    2.  Click the Add button,*Create new datasource* screen opens


    3. Select Microsoft Access Driver(*.mdb) and click Finish.
     
    4. ODBC Microsoft access screen opens, give a name for the data source
        and click the OK button


    5.  Click  the selet button and select the corresponding MDB file
         and click the OK button


    6. The datasource would have been created and check the initial screen


4. Open the SQLPLUS.exe under \Forms_HOME\BIN


5. Connect with the username and password as follows
    username/password@ODBC:DATA_SOURCE_NAME


6. Select the data from tables in MSACCESS as we do it in Oracle.
     
    Select * from EMP;